
Dynamics 365 Sales Automation with Power Automate: Send Teams Channel Message when Lead Assigned
Dynamics 365 Sales is a cloud-based CRM solution that enables salespeople to build strong relationships with their customers, take actions based on insights, and close deals faster. With Dynamics 365 you can manage your customer relationships, from first contact (lead) to qualifying (opportunity) to deal (Quote/Order).
Dynamics 365 can be used by Microsoft Power Automate to automate almost anything within Dynamics 365. Dynamics 365 and Power Automate together, make a great combination for further enhancement of your sales process.
In this example we will teach you how to use Power Automate to send a message to your sales staff via Microsoft Teams when a new lead has been assigned to them in Dynamics 365.
Step 1: Create new Power Automate Flow
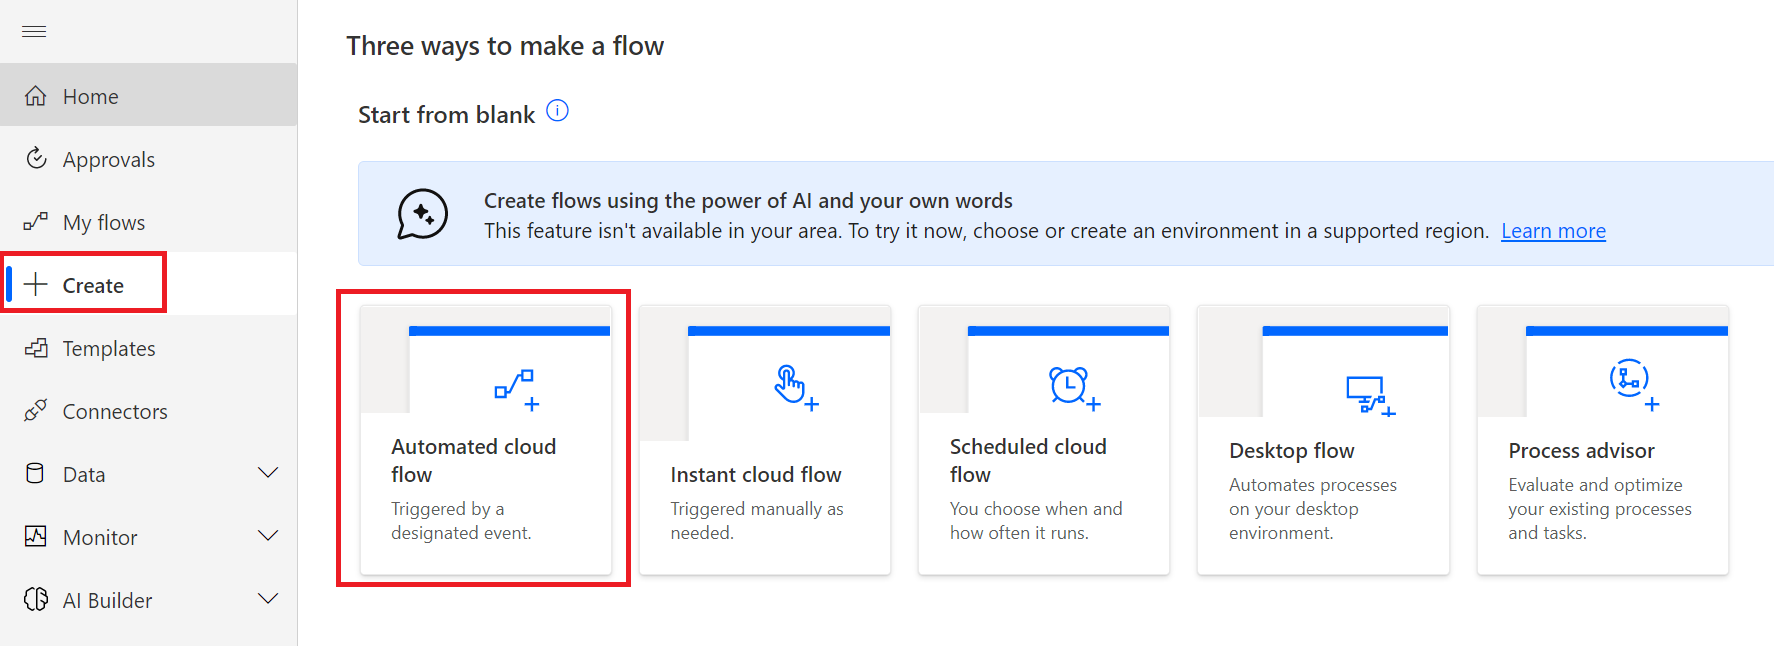
Go to https://make.powerautomate.com/ and click on “Create”, and select “Automated Flow”
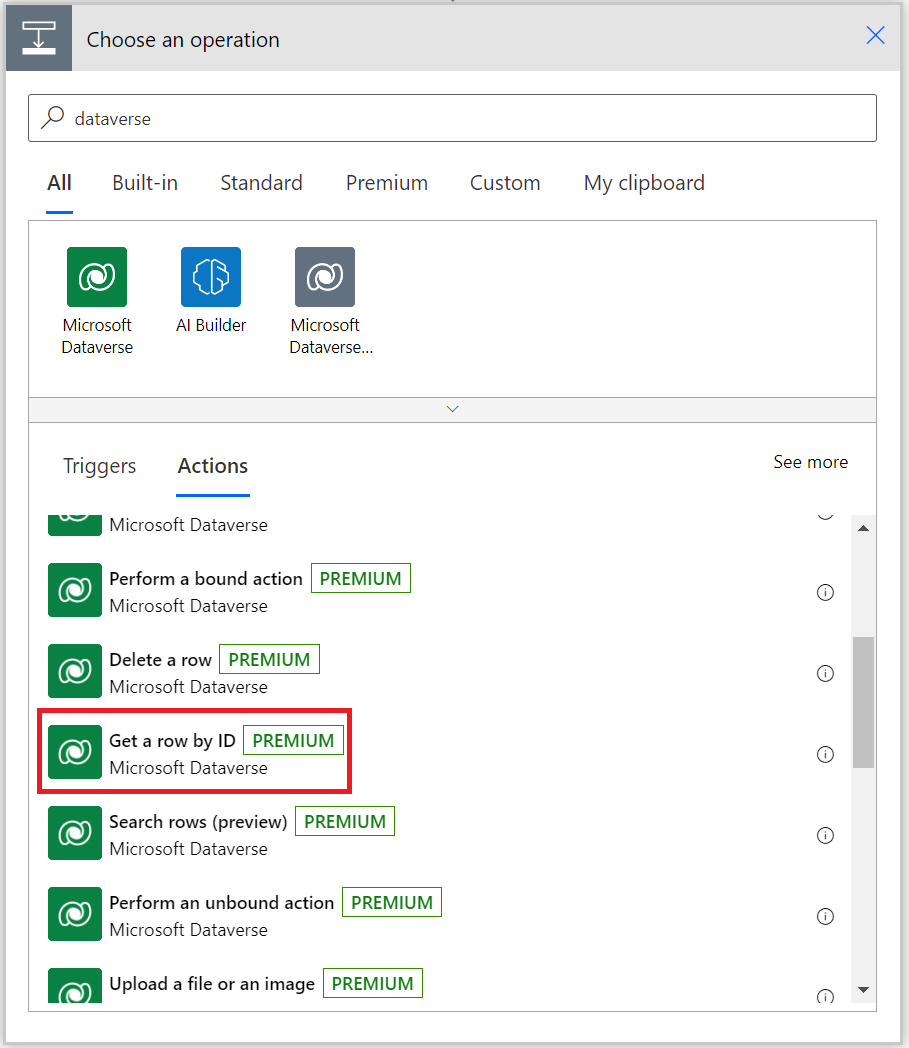
Step 2: Enter Flow name and select Dataverse
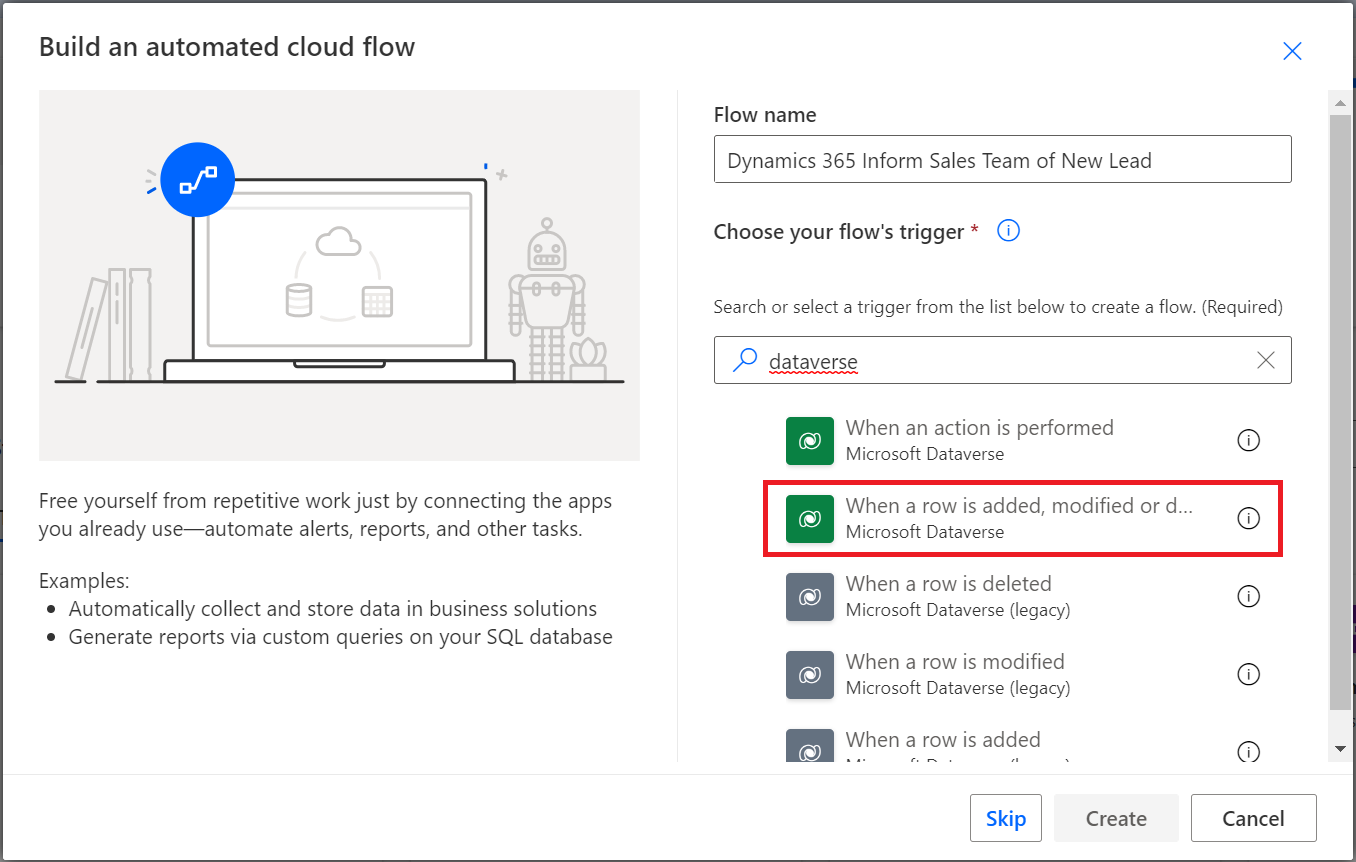
Give the flow a name, and search for “dataverse” and select “When a row is added, modified or deleted”
Step 3: Configure Trigger that will start up our Flow
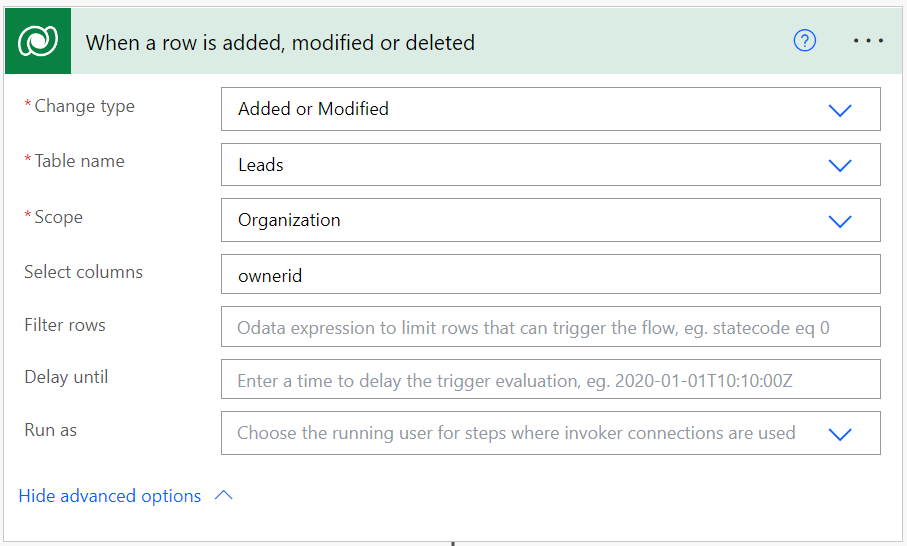
On the next screen we will configure the trigger. We will configure the Change Type to “added or modified” to ensure that the trigger only runs when a new lead is added, or when a lead is modified.
Table name: Leads (as we want to target leads in this case)
Scope: Organization (We want this flow to run for the entire dataverse organization, not just our user scope)
Select Columns: We will enter “ownerid” here because we want to make sure that our trigger only runs when the field “ownerid” (which is the lead owner) is added or changed
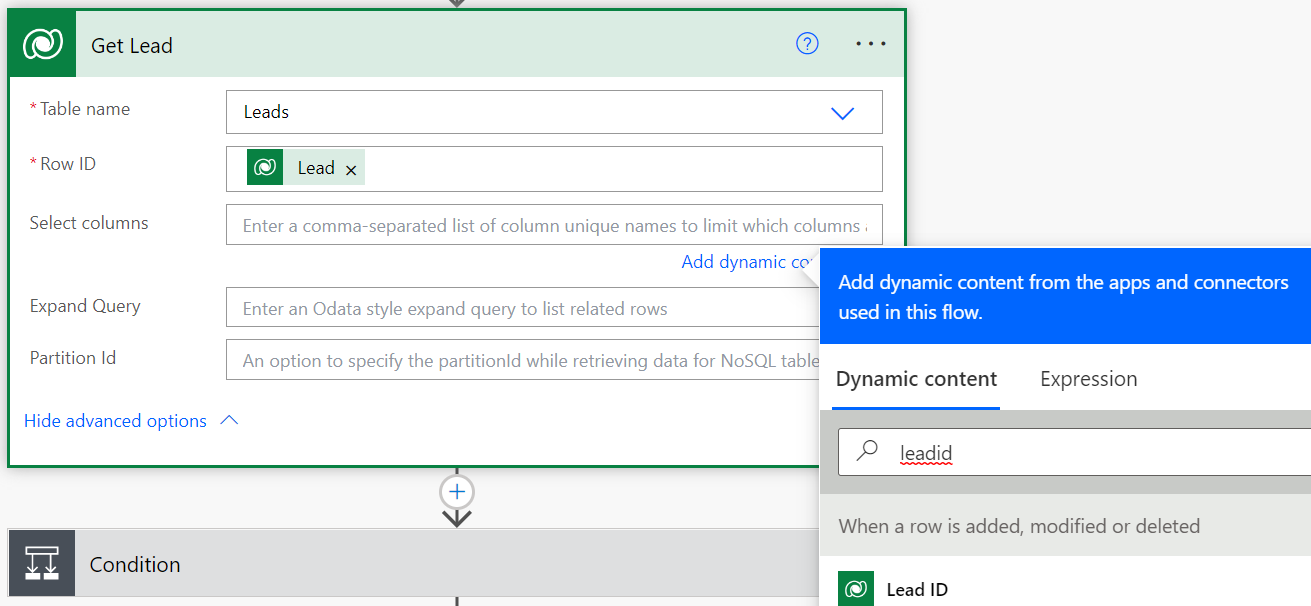
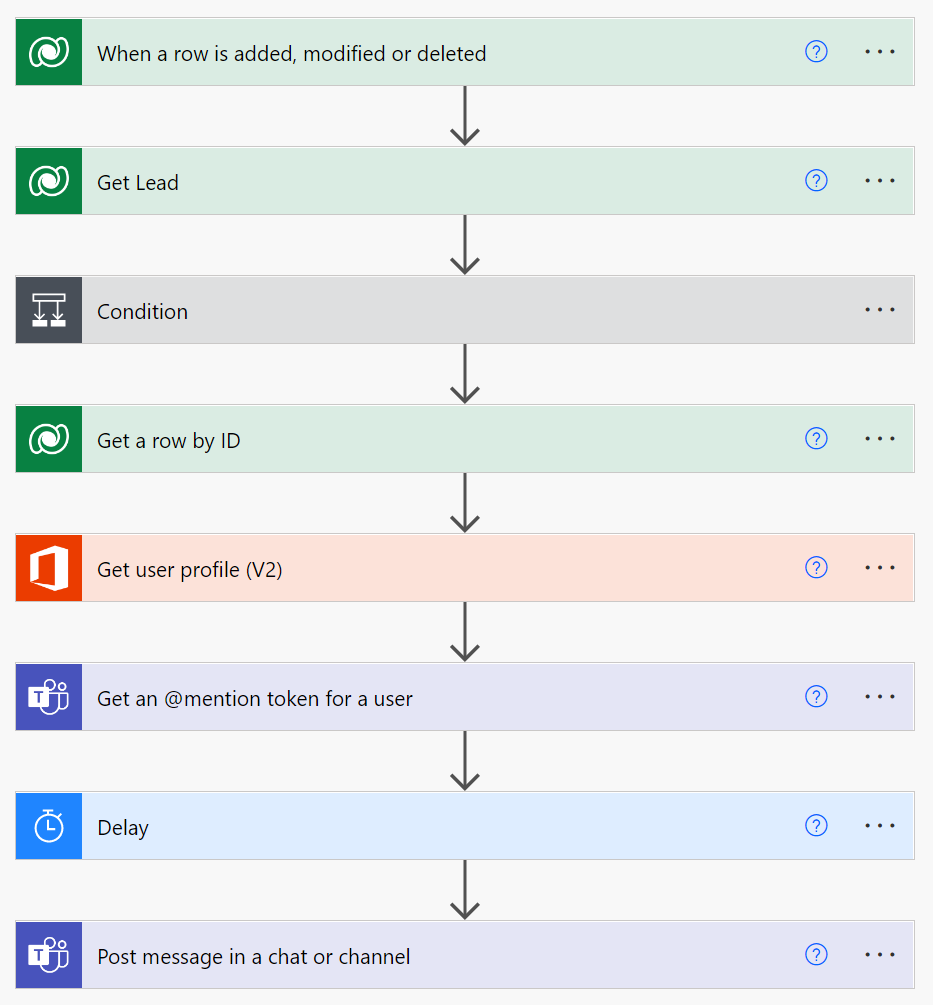
Step 4: Get Current Lead
First we need to get the record of the lead that had an addition/change to the lead owner. We will add a new action to our flow and search for “dataverse” and select “get a row by ID”
We will select the table name “Leads” and for Row ID we will select “lead ID”
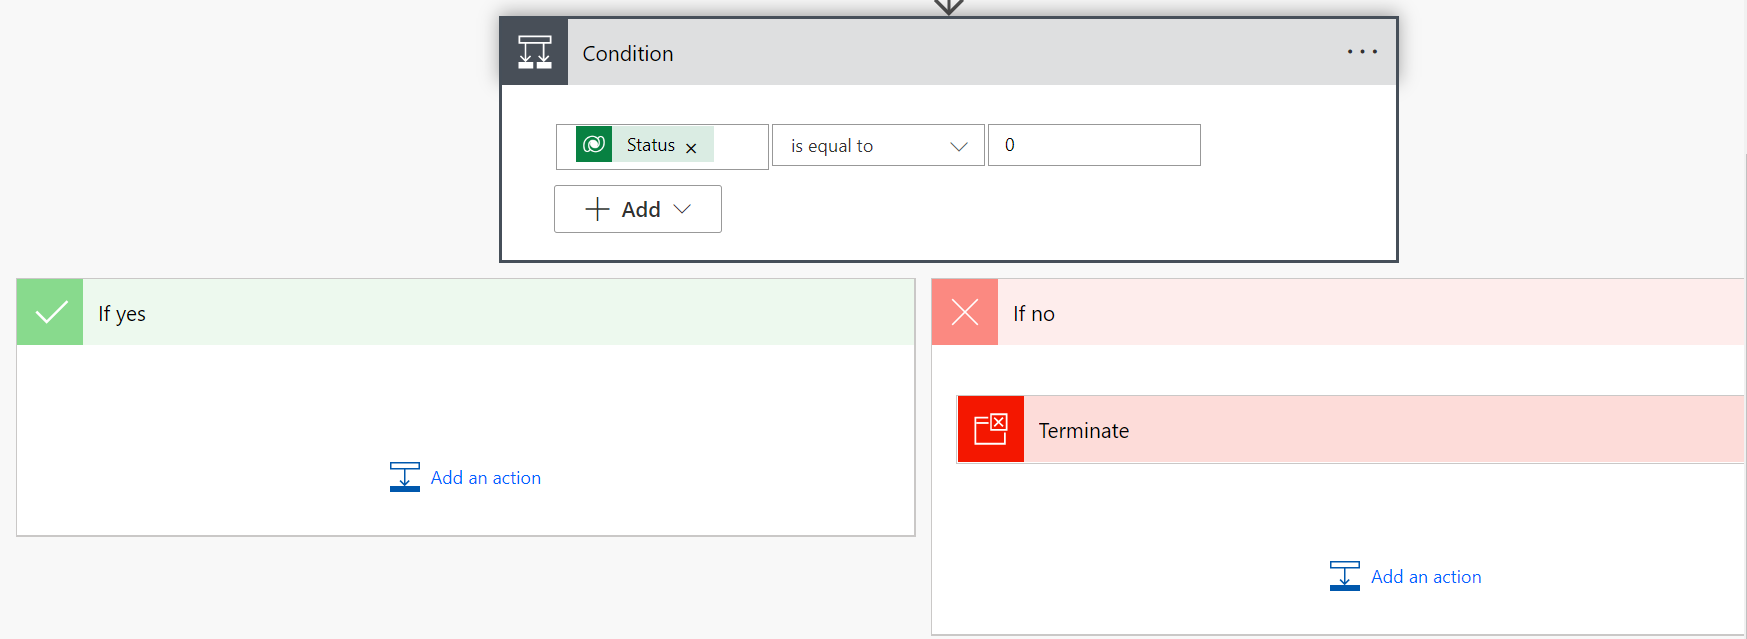
Step 5: Ignore Closed Leads
To make sure we’re not going to process leads that have been closed already, we need to filter out the closed leads with a condition. We can do that by terminating the flow if the “Lead Status” is equal to 0.
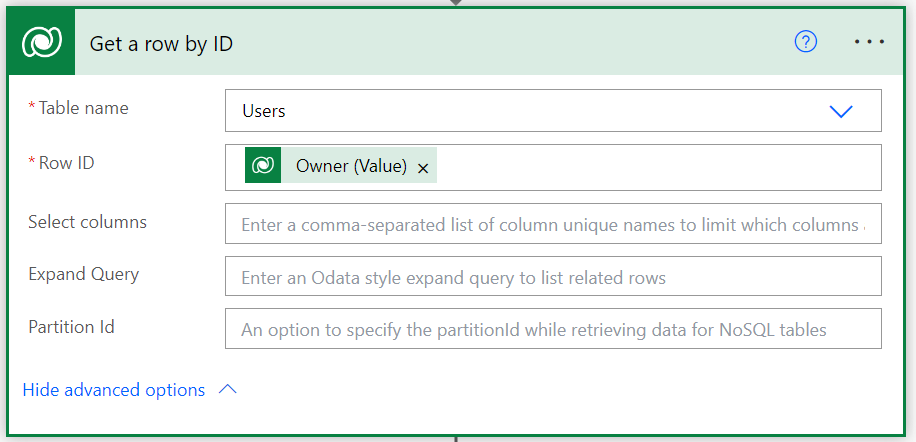
Step 6: Get Lead Owner
For the leads that are not closed, we continue by getting the lead owner from the relationship between table “leads” and “users”. We can do that by retrieving the Table “Users” and get the row id from the Owner Value from the Leads.
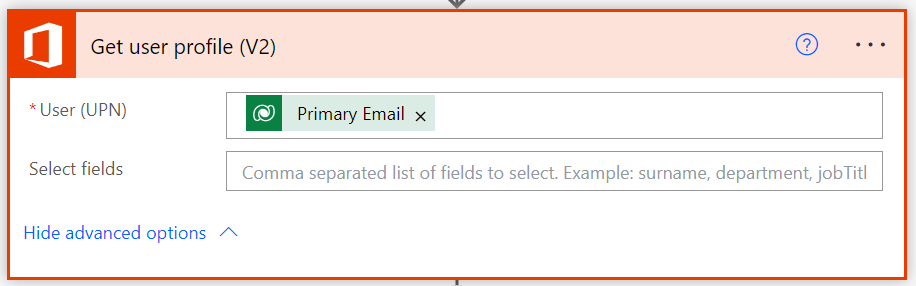
Step 7: Get Lead Owner Email Address
Since we want to send a teams message, we will need to retrieve the primary account UPN for that particular owner. We can do that by creating an action called “Get user profile (V2)”, and search the user based on the primary email address we got from the previous step.
Step 8: Get a Mention token for a user in Teams
Since we want to send a message in a particular channel, and tag the owner in the message, we need to get a “mention token” for this user. We can do this with the task “Get an @mention token for a user” from Teams, and use the user principal name we got from the previous step:

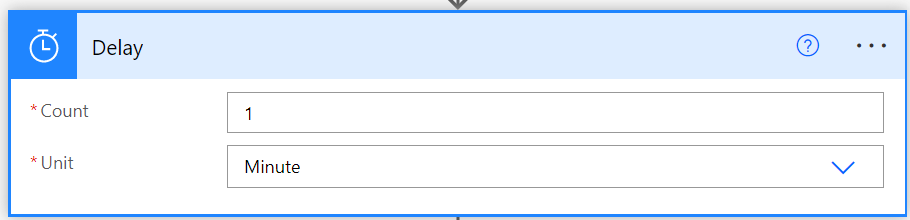
Step 9: Delay task for 1 Minute
In order to make sure that Teams is ready to accept our message with mention token, it is recommended to add a 1 minute delay, to make sure no errors occur:
Step 10: Post a Message in a Chat or Channel
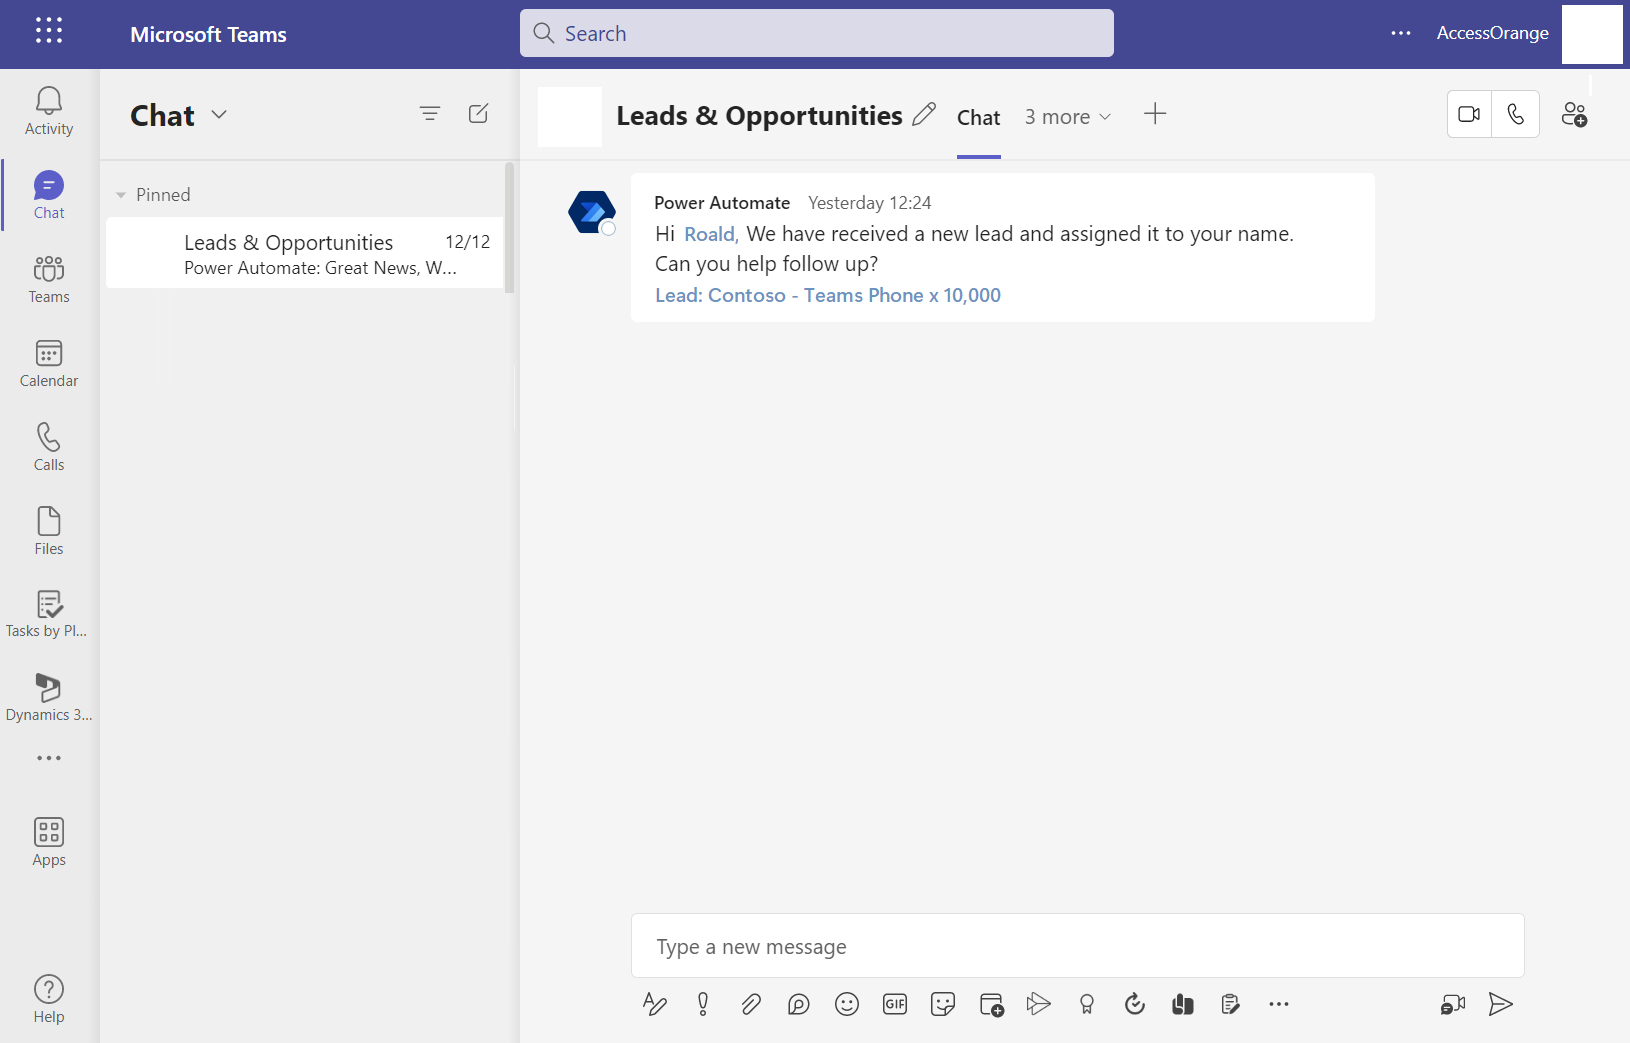
Now we have all the information we need, we can post a message in a Teams Channel. In our case we post it in a group chat, but you can also choose a channel.
For the message, we will include not only the Lead Company Name and Lead Topic, but we also want to include a link to the actual lead in dynamics.
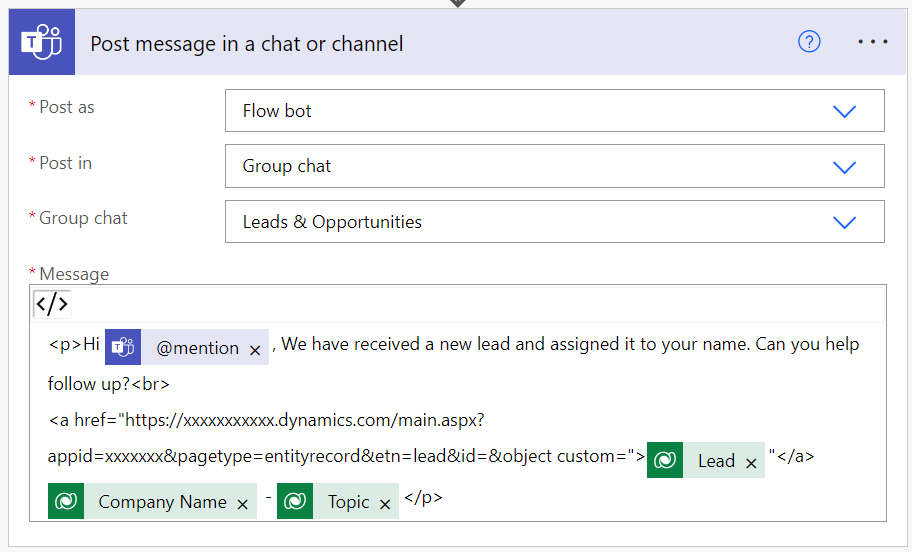
Make sure that you enter the fields using the Code View “</>” option, so your urls will not be truncated or broken. In the Code View option, you can enter HTML code to change the layout of the text. (We use <p> for paragraphs, <br> for lines etc
You can see from above screenshot, we first add the “mention token” and then we also include a link to the URL of the lead in Dynamics.
How to get the Lead URL in Dynamics:
- Go to Dynamics 365 – Leads
- Click on any Lead
- Extract the URL from your browser, and remove the last guid from the url (see orange below)
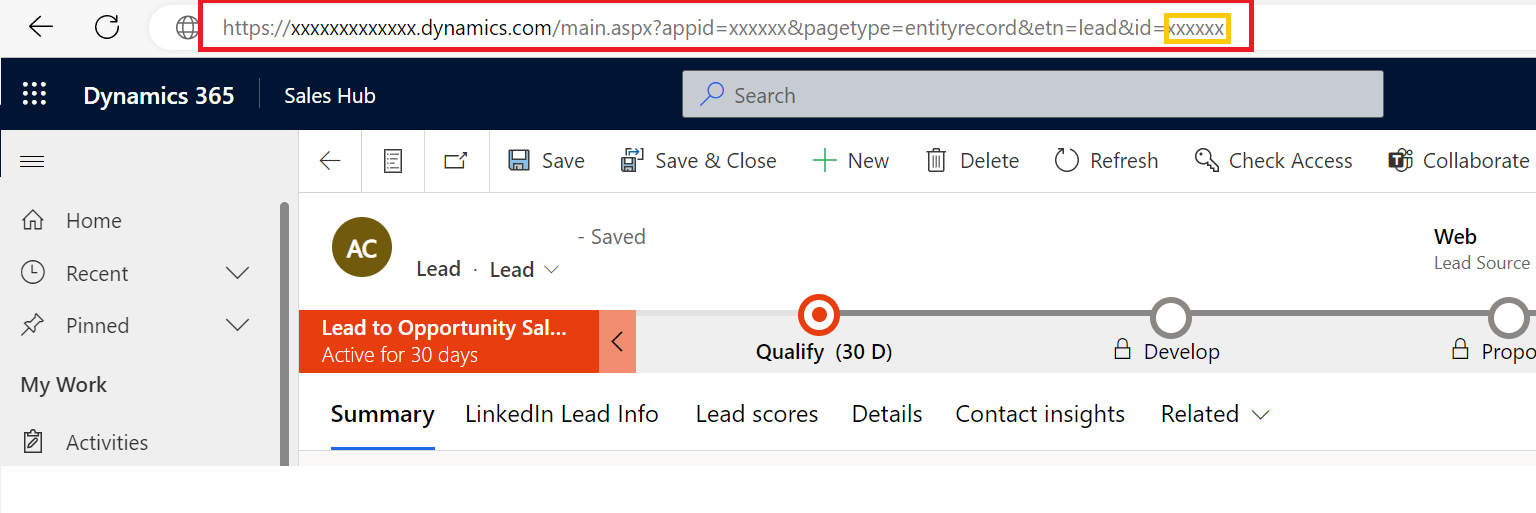
The URL you should use should looks something like:
https://xxxxxxxxxxxxx.dynamics.com/main.aspx?appid=xxxxxx&pagetype=entityrecord&etn=lead&id=
Now paste that in your Flow and make it a Link using the html <a href=””> lead </a> code.
When you’re done, your flow should have the following steps:
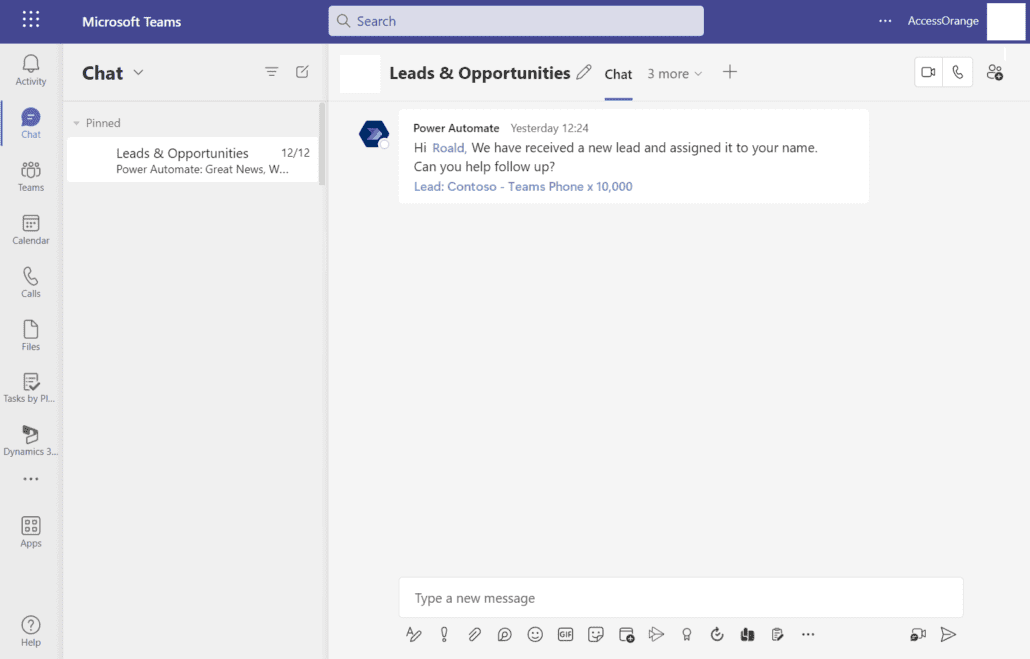
Now you can test your flow, and (hopefully) it should work. Here is an example of how it looks on our side:
Great Work! Feel free to reach out if you have any issues or questions regarding above flow.


")
")


Leave a Reply
Want to join the discussion?Feel free to contribute!