Tag Archive for: Dynamics 365 Sales

Dynamics 365 Sales provides businesses with a centralized platform to manage their customer interactions, account information, and sales processes. With Dynamics 365 you can keep track of your customer accounts and contacts by allowing your team to store and access all customer-related data in one place.

In Dynamics 365 Sales it is possible to link contacts to accounts. This feature allows you to associate individual contacts with their respective customer accounts, allowing for a more comprehensive view of customer interactions and relationships.

By linking contacts to accounts, you can easily access information about an individual contact’s role within their company, as well as view a complete history of interactions with the entire organization. This information you can use to personalize interactions with customers, track the progress of opportunities and deals, and make informed decisions about future sales and marketing efforts.

Unfortunately, the process of linking contacts is a manually process, where the user who creates the contact have to manually select to which account it belongs. This manual process is time consuming, and often is forgotten along the way, making your CRM database less effective.

Therefore we have come up with a solution to automatically link your customer contacts to your accounts via Power Automate!

The solution to automatically link your contacts to your accounts with Power Automate

First of all, we assume that all your contacts have an email address, and that your customers all have a unique email domain (which should be reasonable!). We will use this email address to build a relationship between your Account and the related contacts.

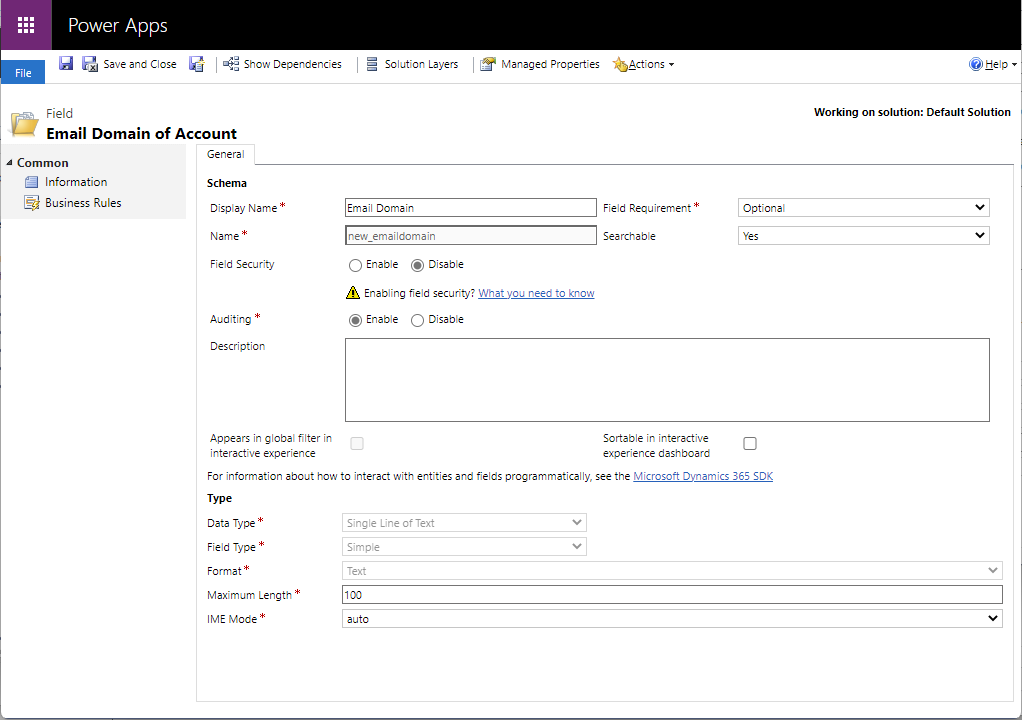
First of all, we will create a custom field called “email domain” under our account card. Here is an example:

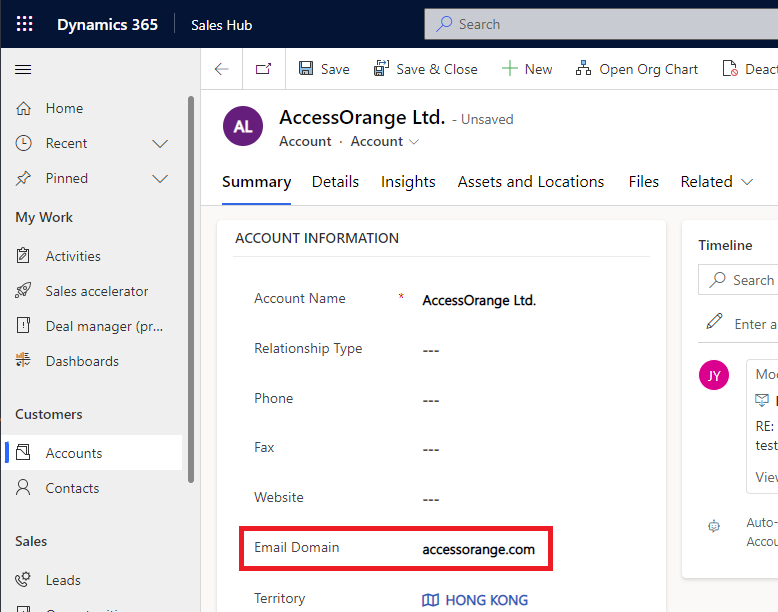
In this field, we will input the email domain of the customer. This will be used in our Power Automate script to link all the individual contacts to the Account master.

Step 1 – Create custom field for email domain

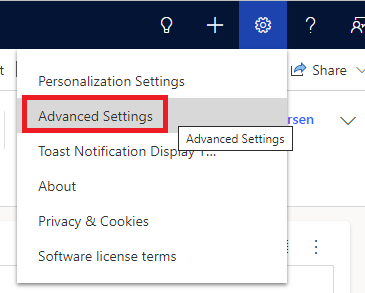
Go to Advanced Settings

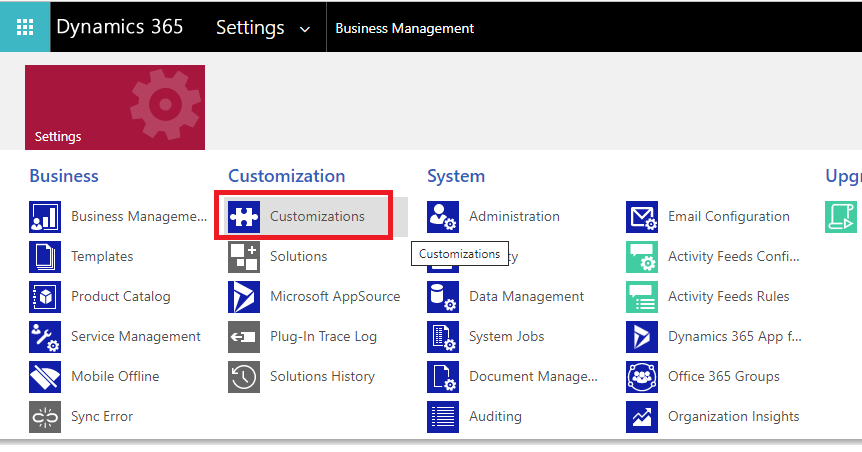
Under Settings, click Customizations

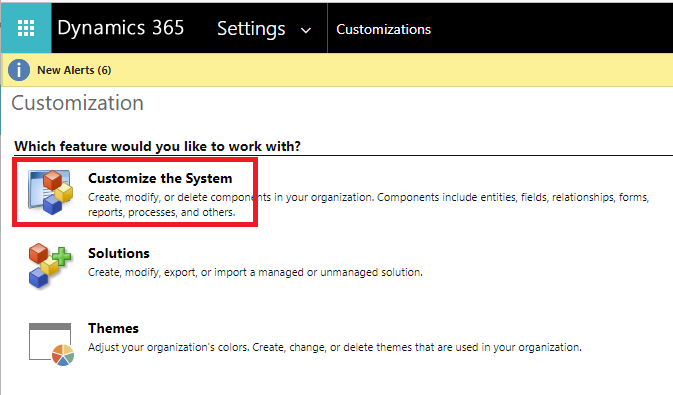
Click Customize the System

Under the customization screen, find the entity Accounts and go to Fields

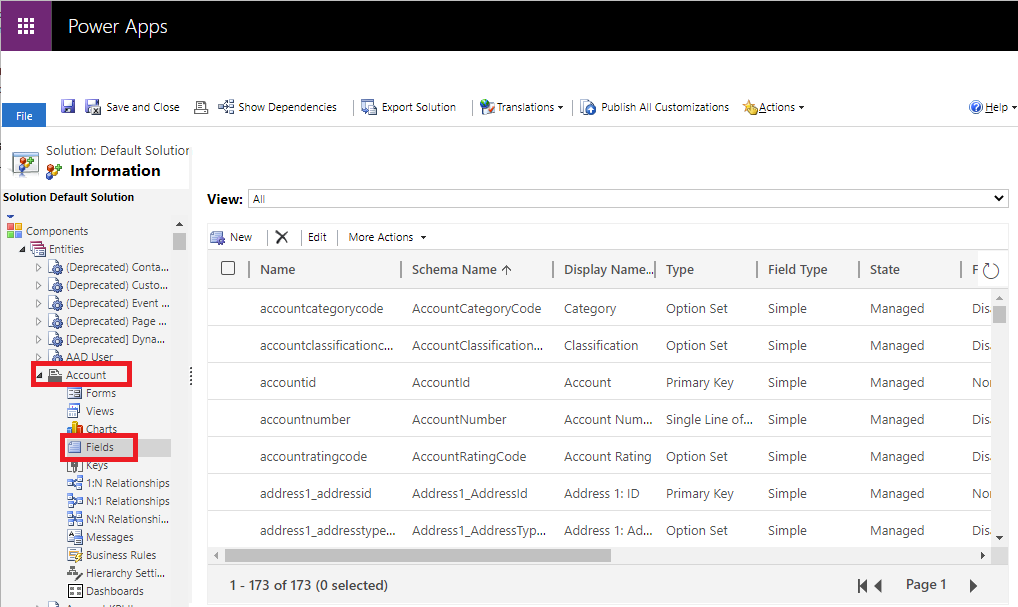
Here we will add our new email domain field by clicking on New 

Create the field name, and configure the settings as below

Click Save & Close and return to the previous screen

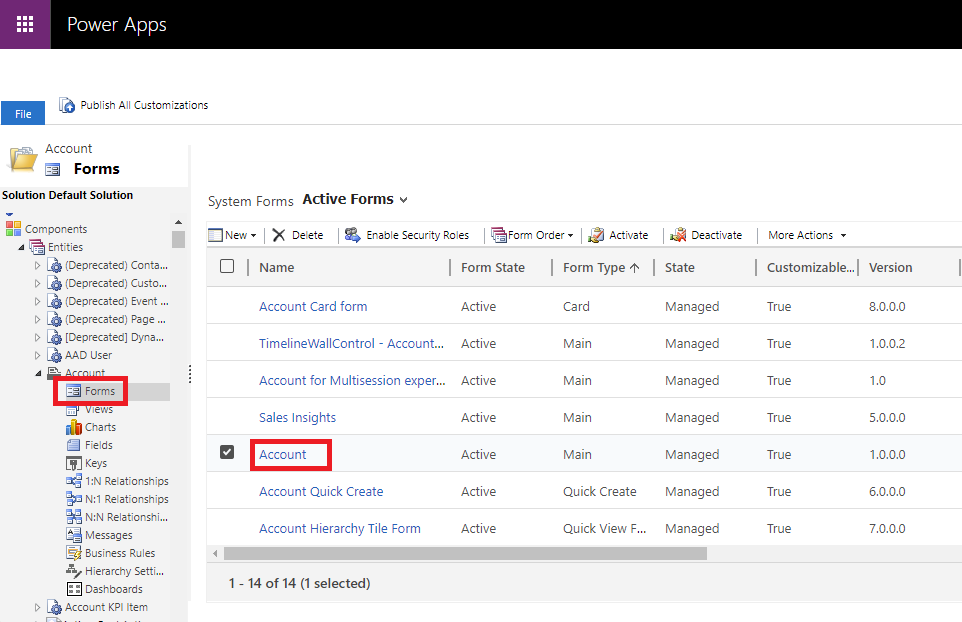
Now we will go to the Forms section and add our custom field to the accounts form

Note that you can also add the field on other forms if you want, for example the Account Quick Create, so when your sales team creates a new account via outlook, they also will be able to enter the domain field there.

Find your email domain field on the right and drag it to the location you want to have it on the form.

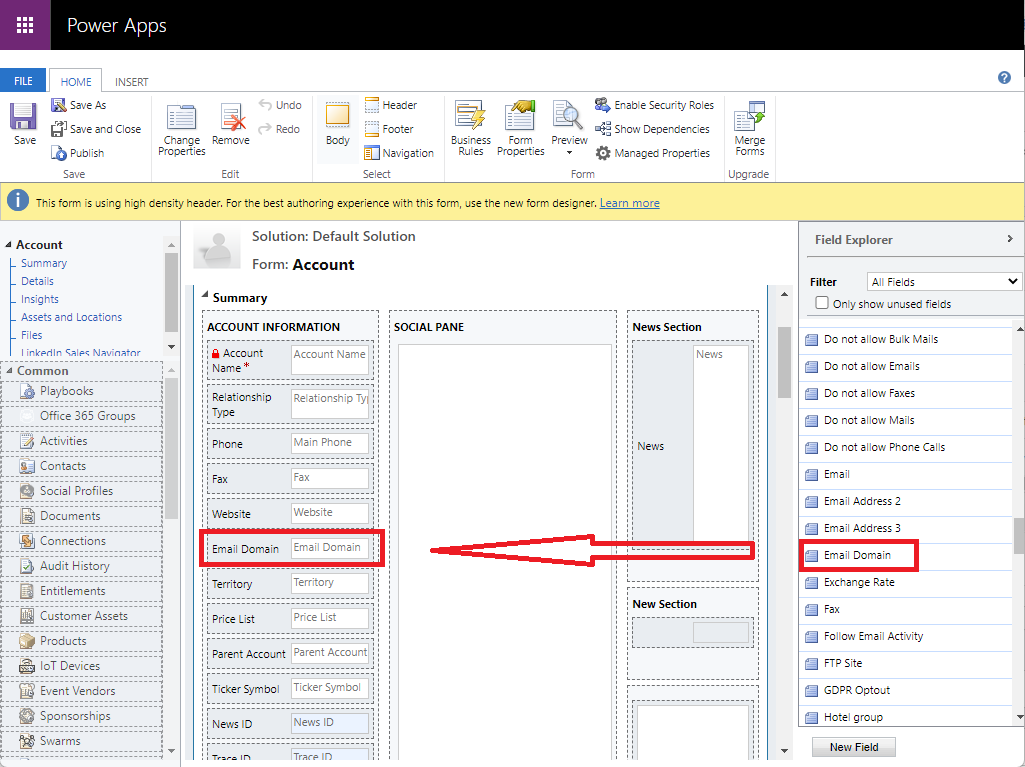
Click Save and Close

Click Publish All Customizations

Now you have the email domain field on your account card, where you can enter the email domain of the customer!

After this step we can now move on to the Power Automate Script.

Step #2 – Power Automate Script to Link Contacts to Accounts

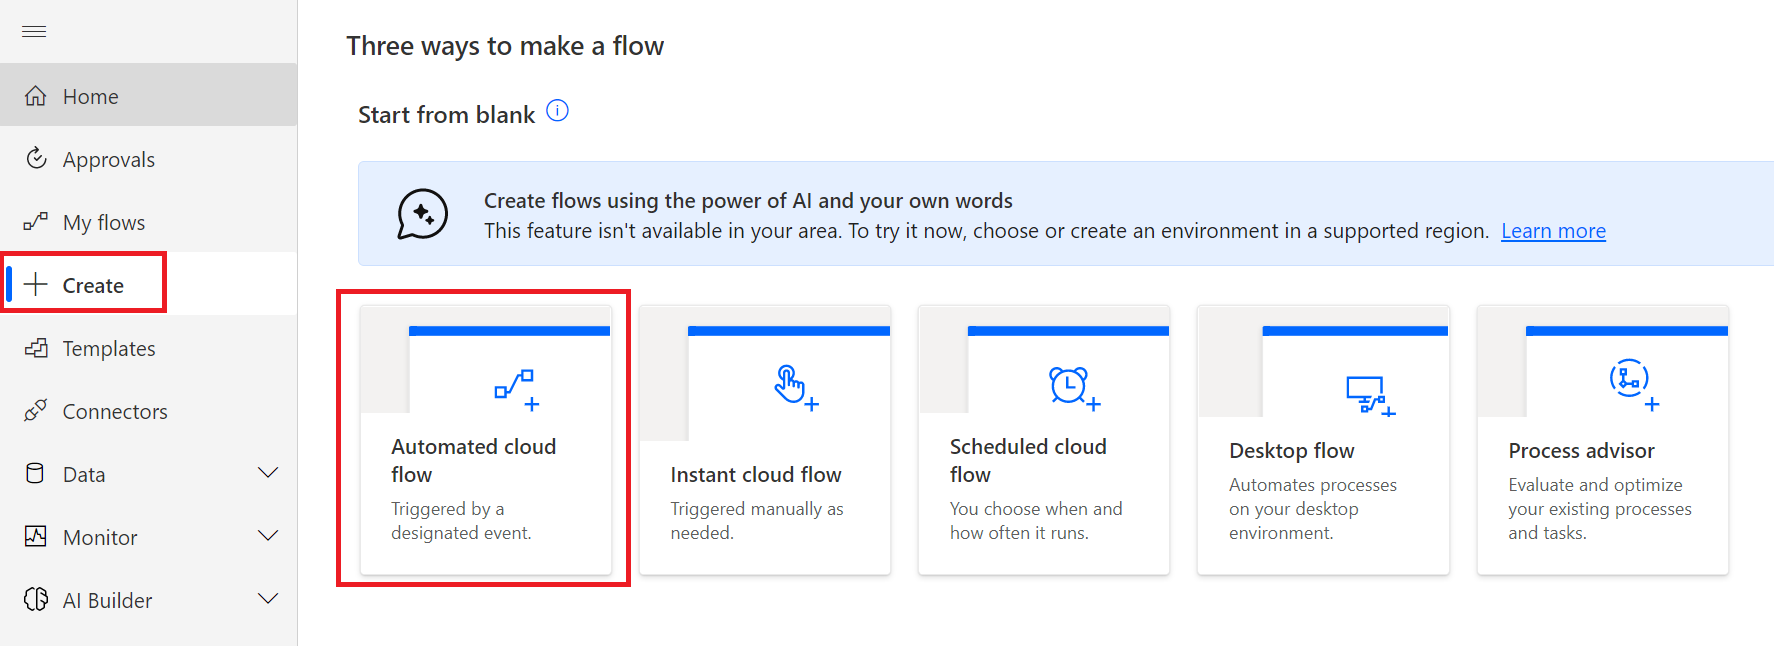
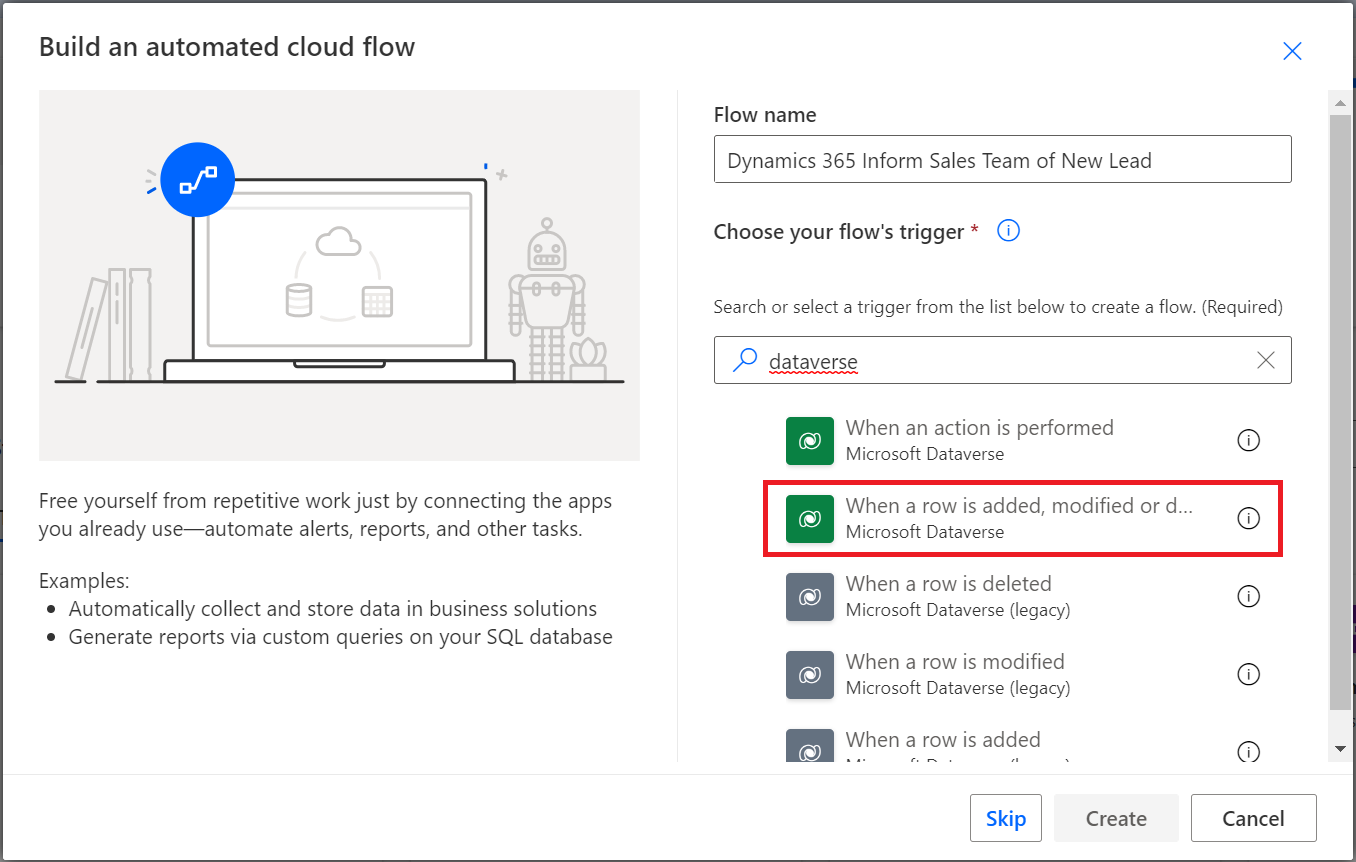
Go to Power Automate and create a new flow

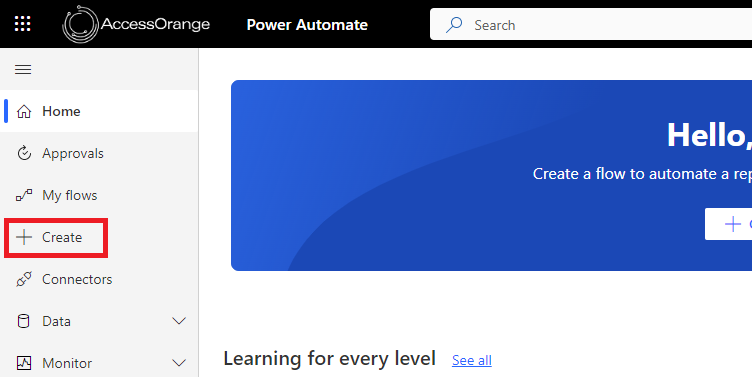
Click Build your Own

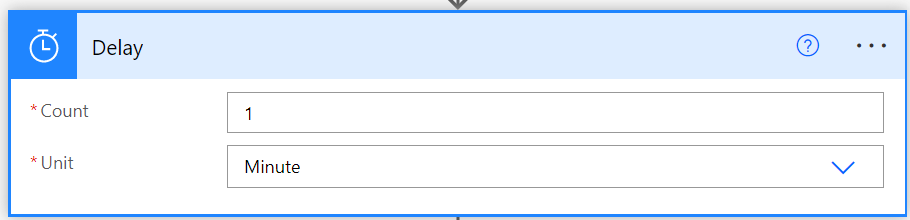
We will use a scheduled trigger to keep things simple, so every day our new contacts will be linked to their master account.

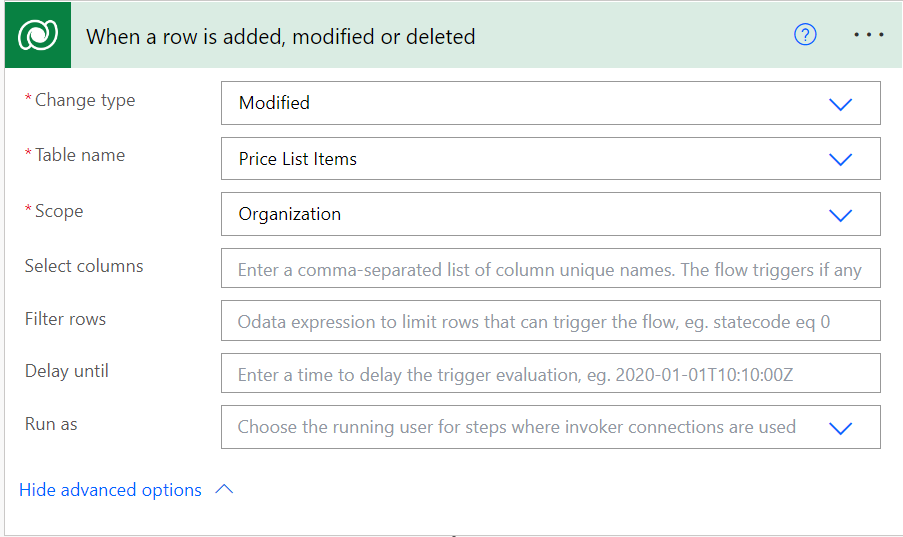
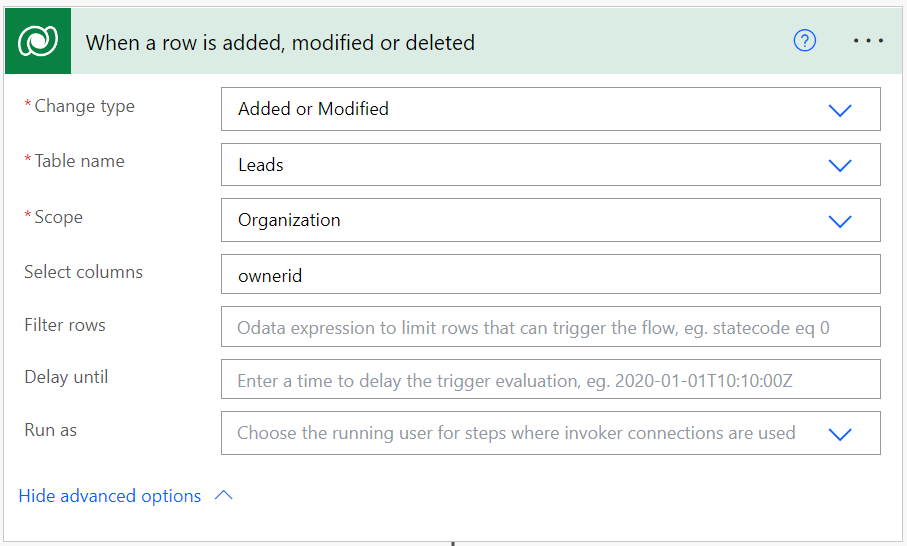
Go into the flow and start adding the next step

Next we need to filter out all the accounts where the email domain is not empty:

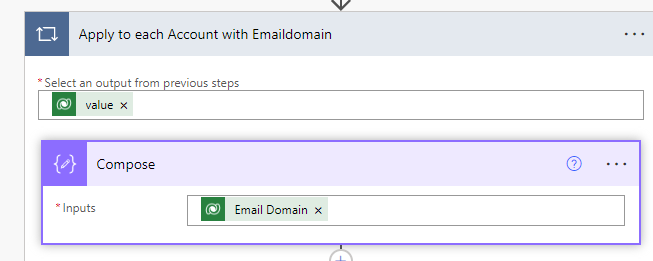
Next is we need to create an Apply to Each loop so we loop through all the records that we found. We can simply start by adding a Compose to our next step, which will automatically create the loop. We can put our email domain field in the compose.

Next, we want to handle multiple entries in the email domain field. We imagine that some accounts may have multiple email domains, hence we will fill them in under the new field as: domain1.com,domain2.com,domain3.com.

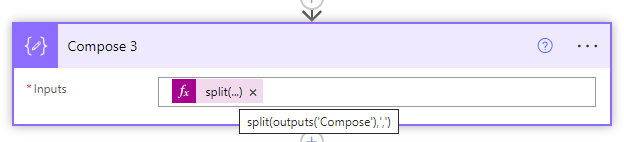
In order for our power automate to process them all, we need to first split our field into separate variables and then loop through them. We first split the string into an array by doing a compose with a split command.

After that we will create another loop by creating an Apply to each on the compose output.

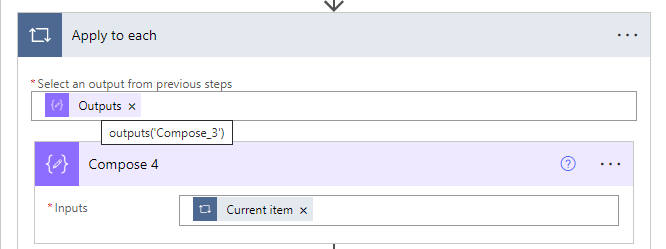
Now we have created the loop neccesary for going through all the acounts and all respective email domains.

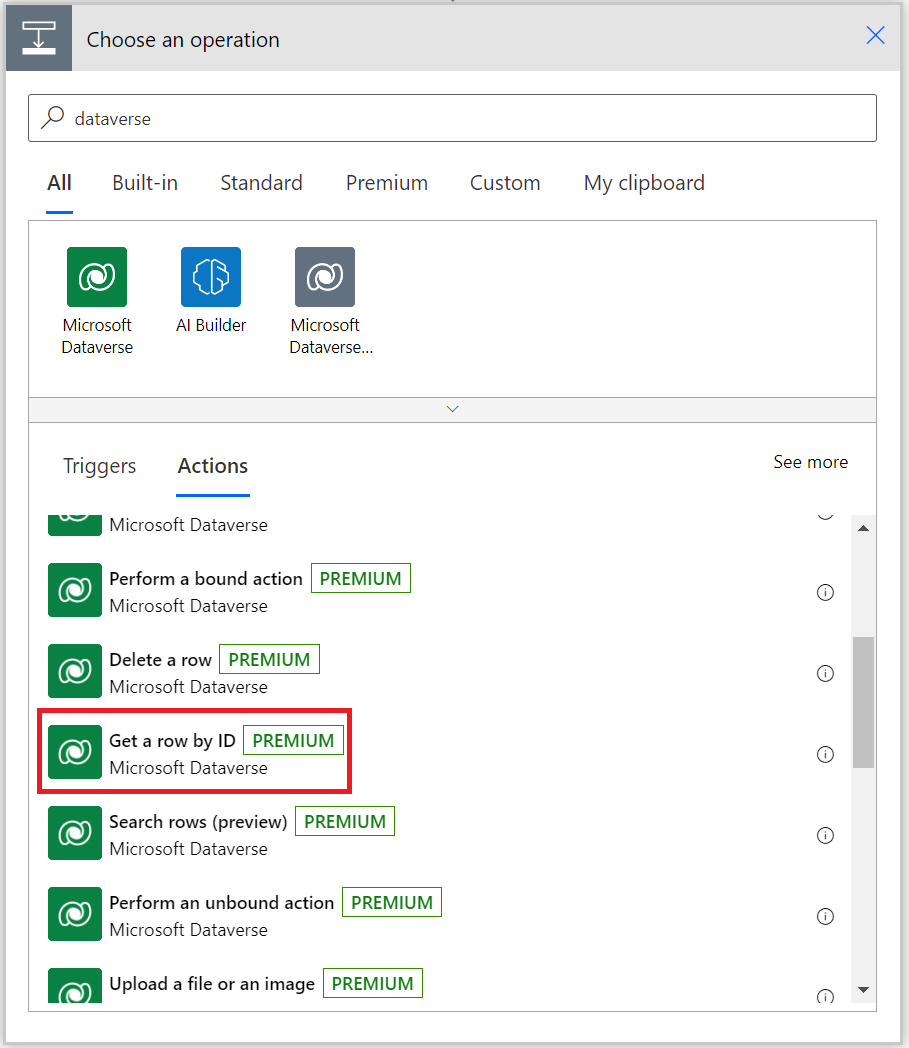
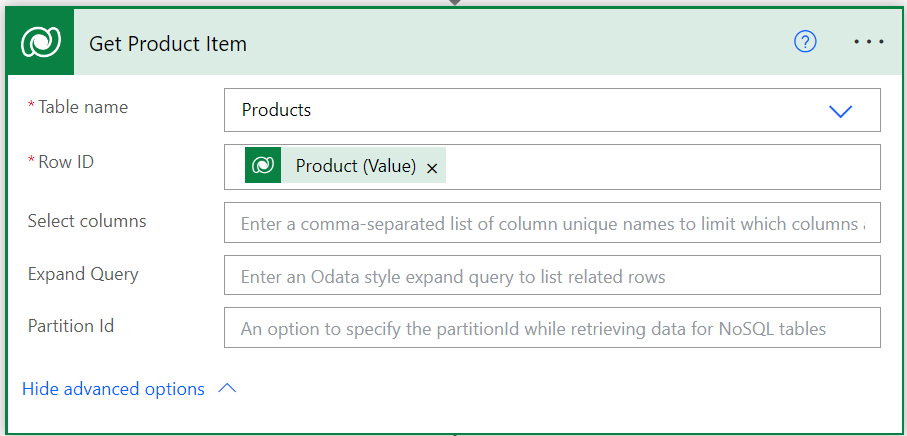
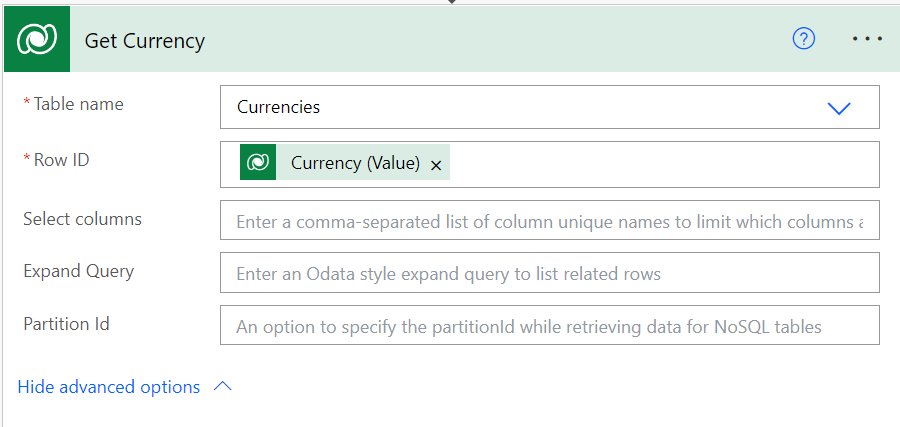
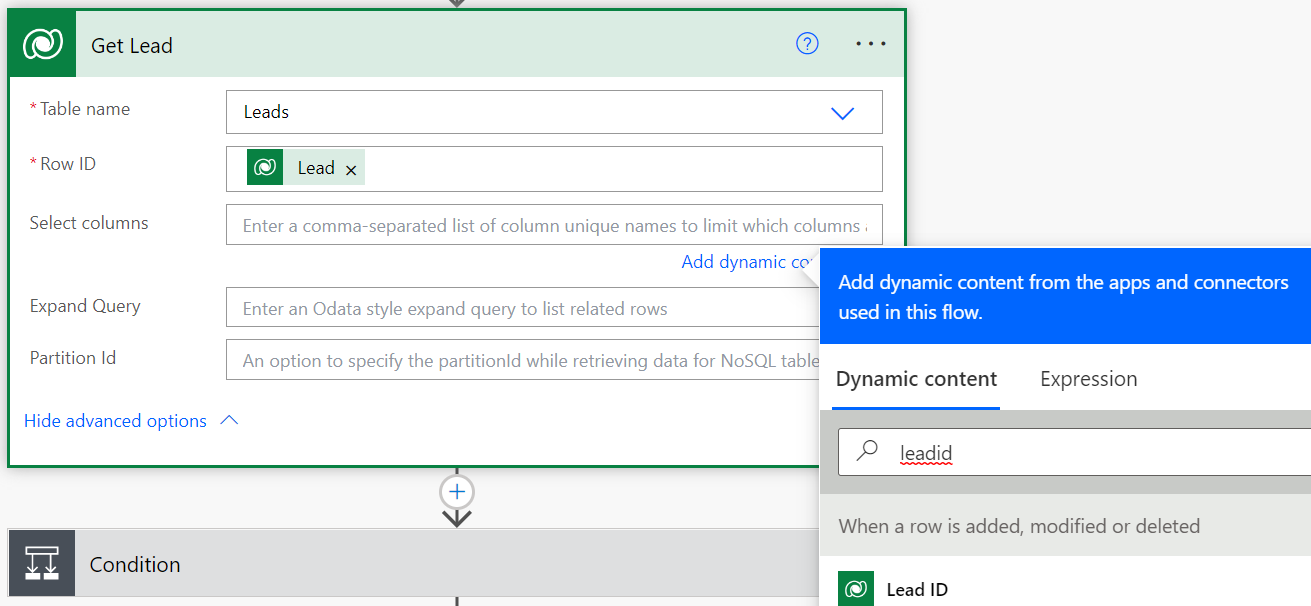
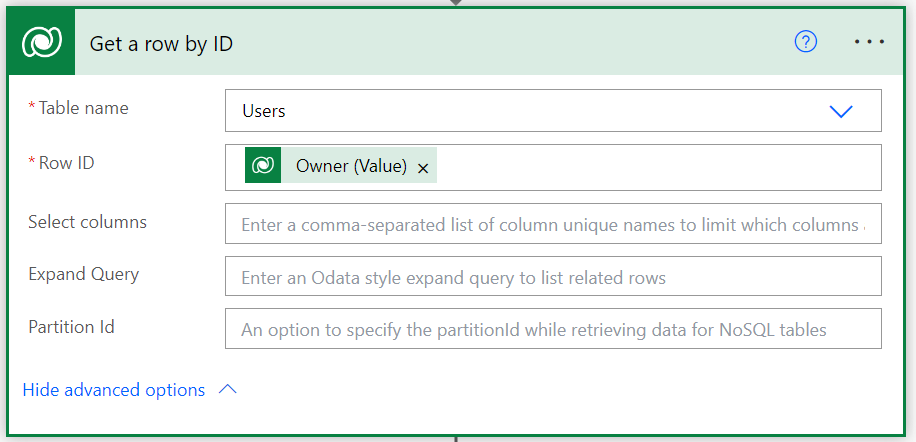
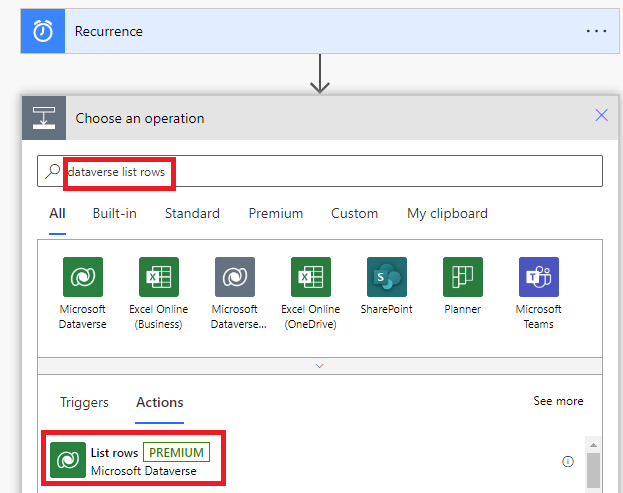
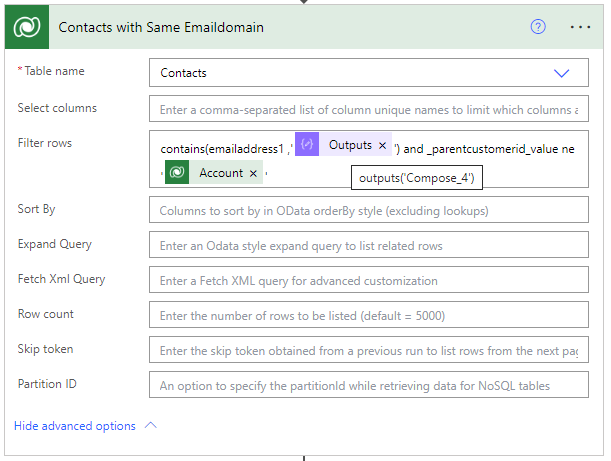
The next step is to retrieve all the contacts that have the current selected domain in their email address, and are not yet linked to the Account.

We can do that with a Dataverse List Rows command, and a filter.

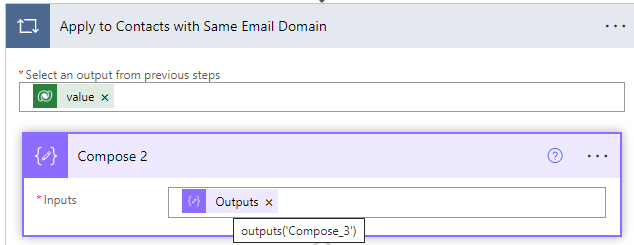
Now we have all the contacts that are not yet linked, so we can loop through them and link them.

We start with creating an Apply to All by adding a Compose (the easy way to create an apply to all)

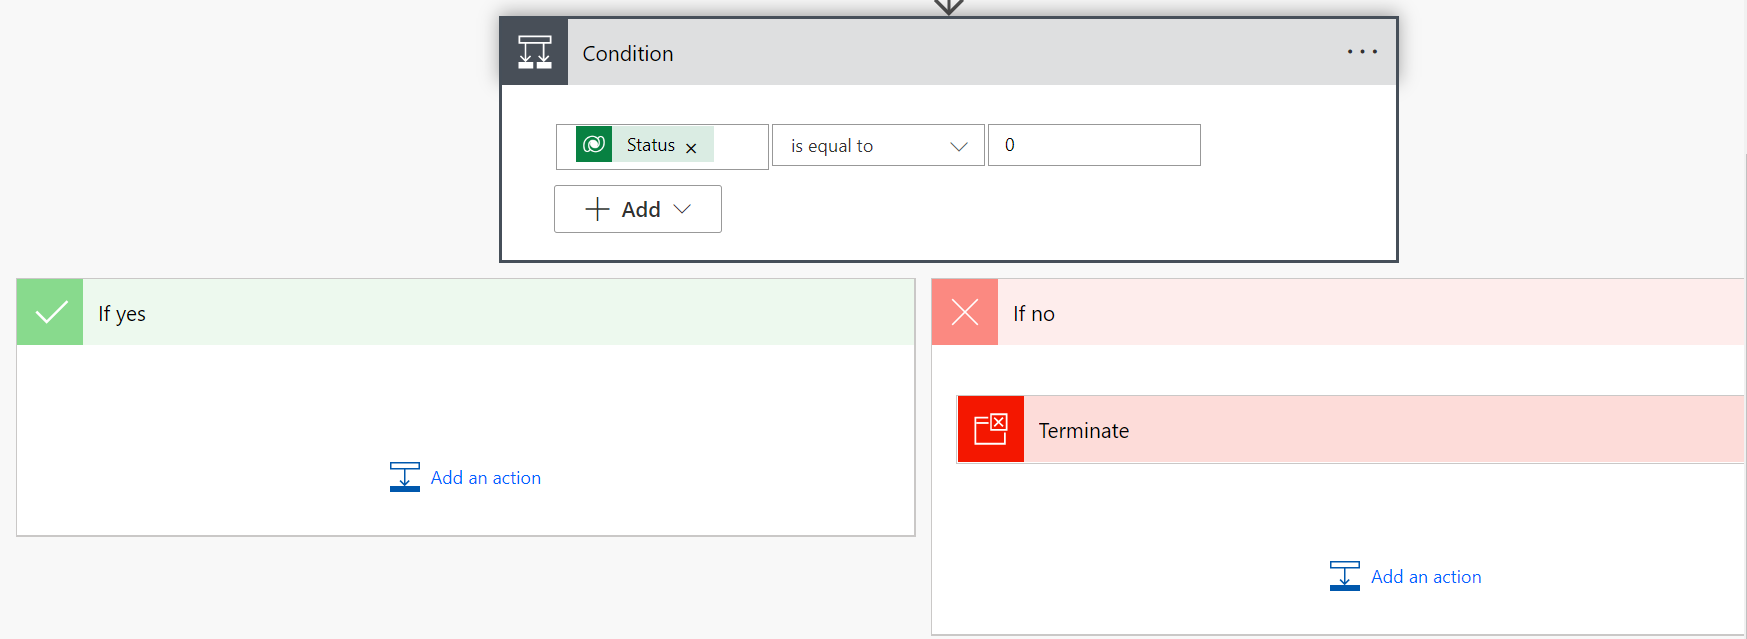
Next we do a quick check if the Contact has not been linked to another account already. (As sometimes maybe user may have an email from a domain linked to customer A, but somehow may still be related to another account in your Dynamics, so we need to check if he/she has not been linked already to another account)

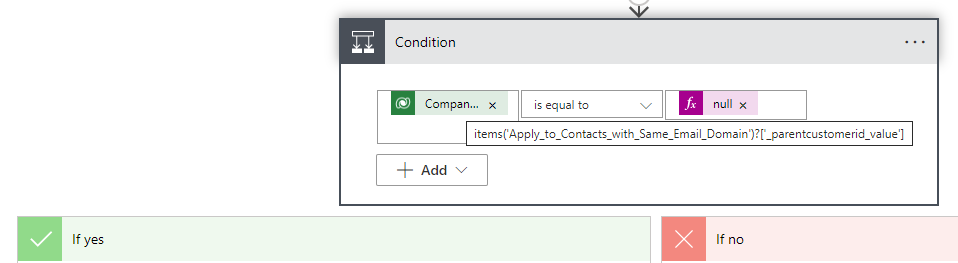
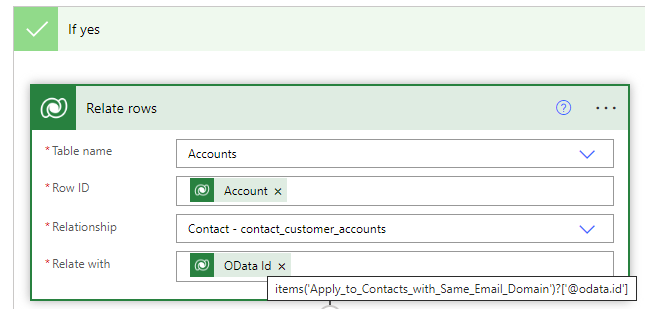
If the Parent Customer ID Value is null, it means the contact is not yet linked and we can proceed with linking it to our Account via a Dataverse Relate action.

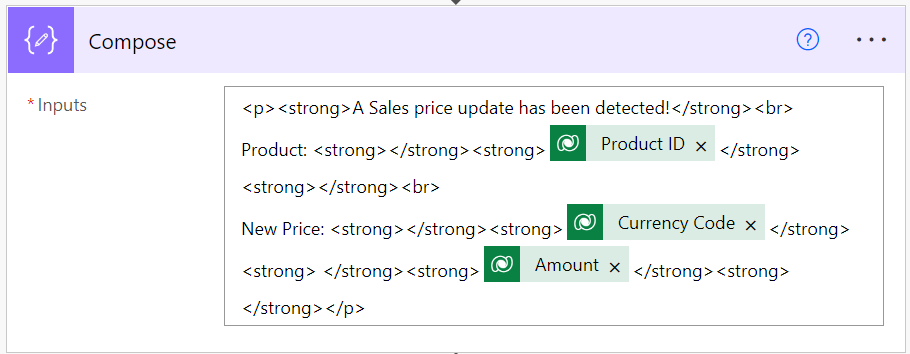
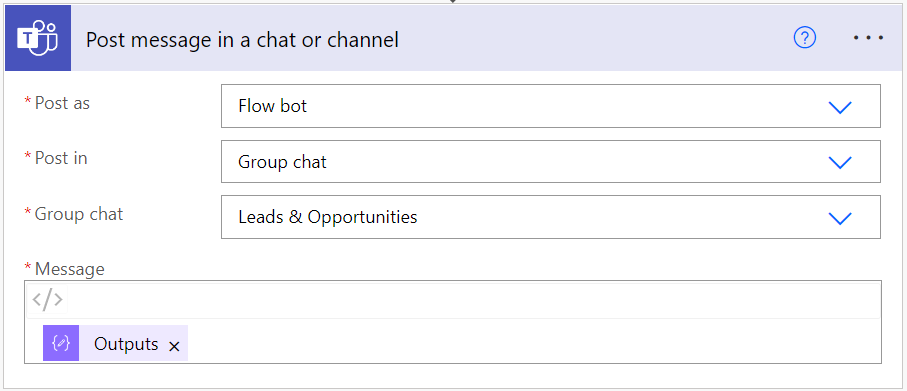
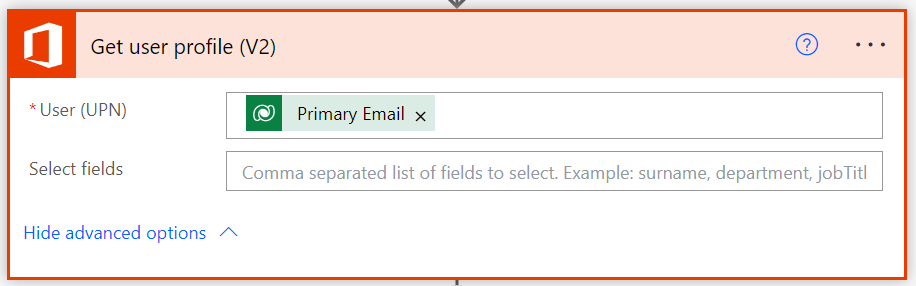
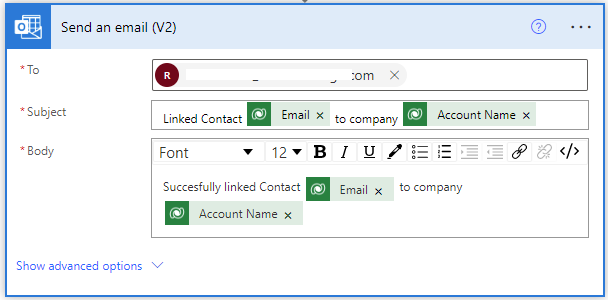
We add one more Send Email flow to inform ourselves of a succesful link.

And we are done!

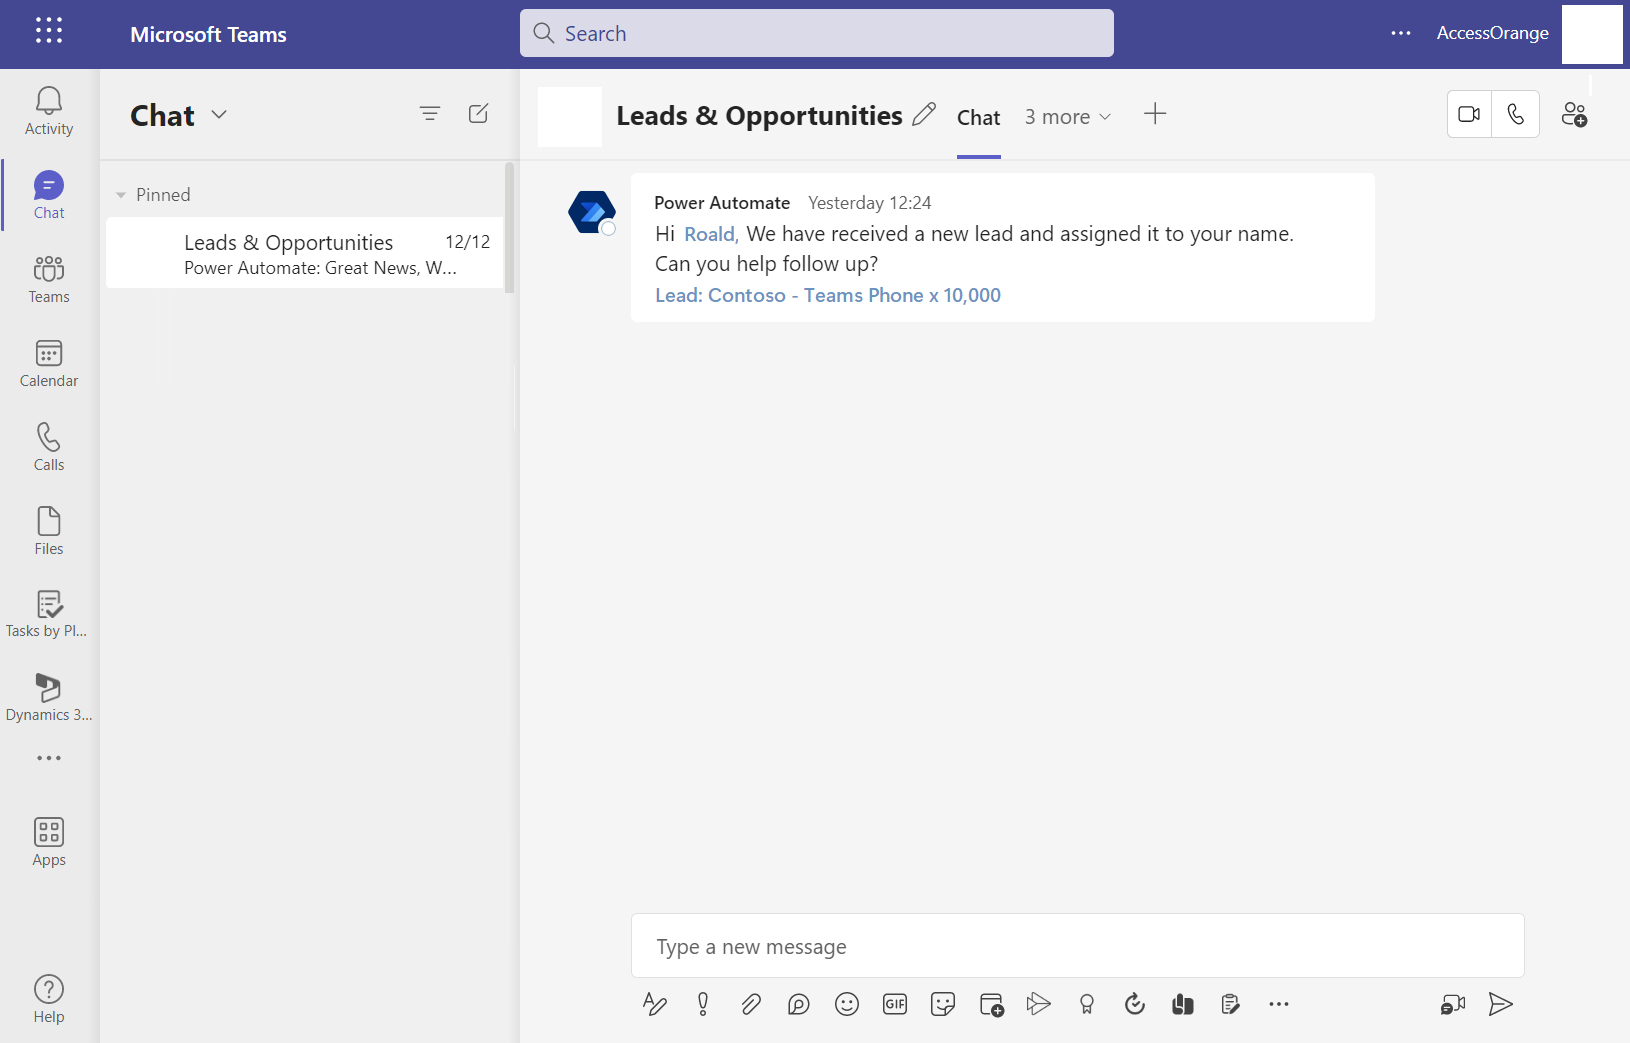
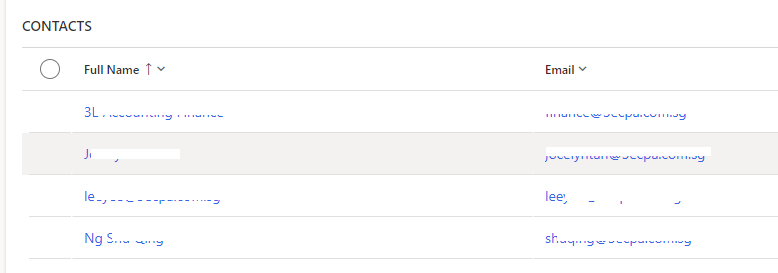
Now we can run the flow and we can see that all the contacts with the same email domain have been succesfully linked:
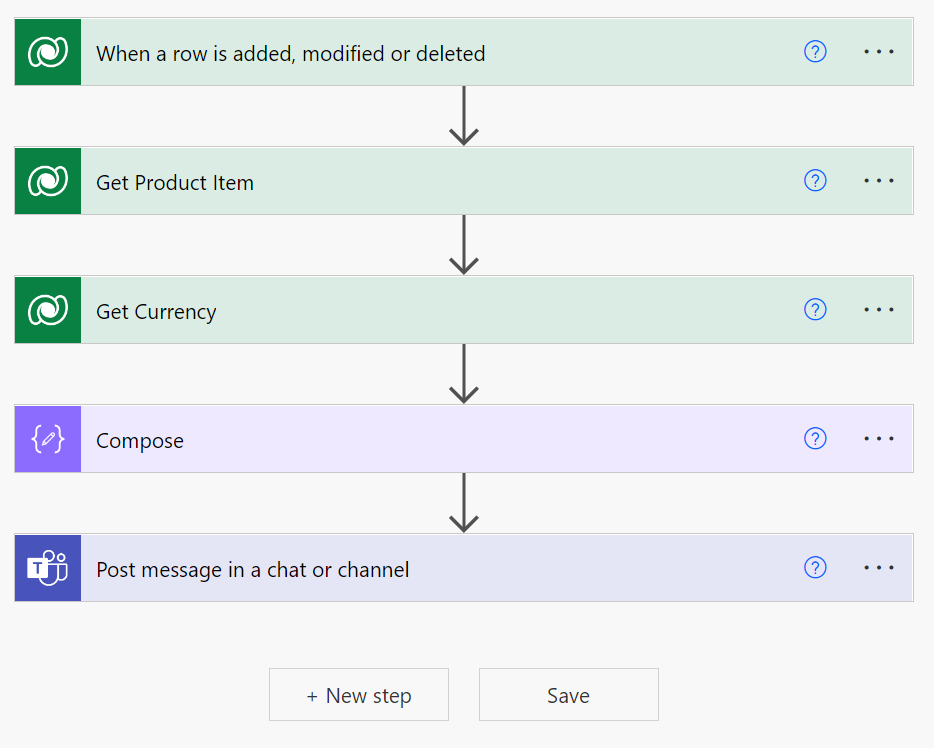
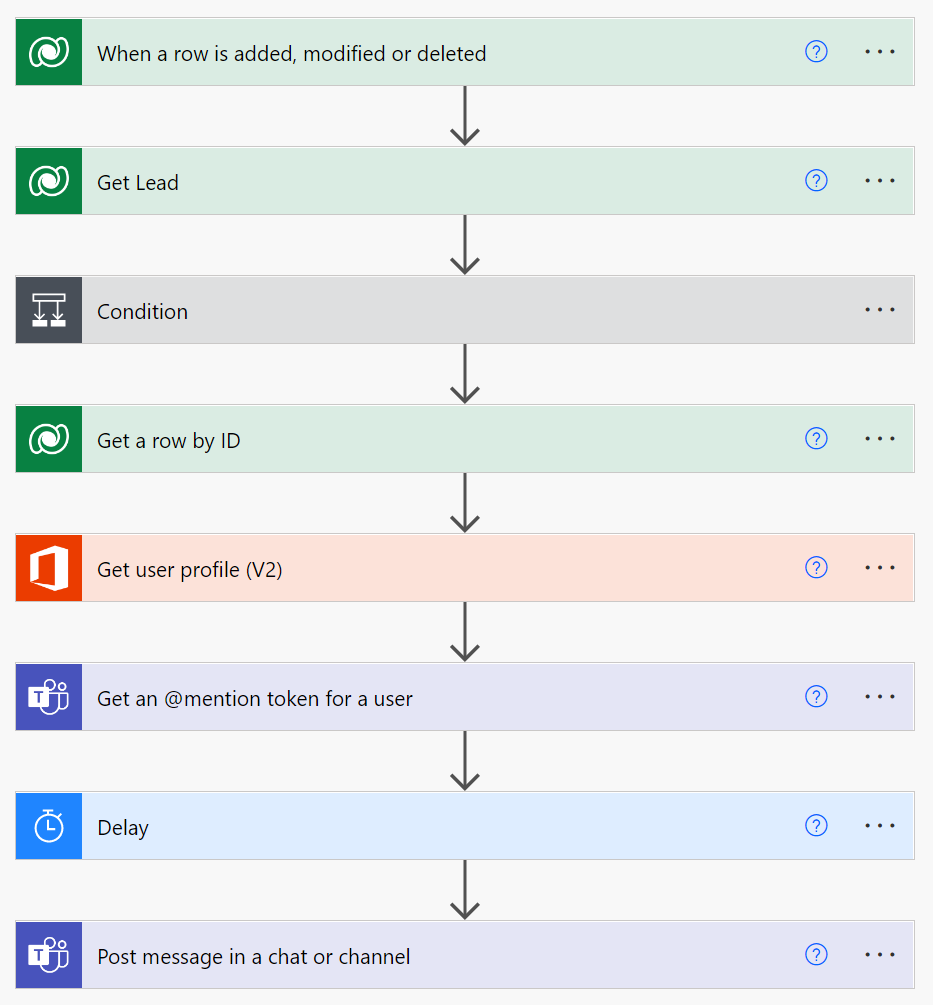
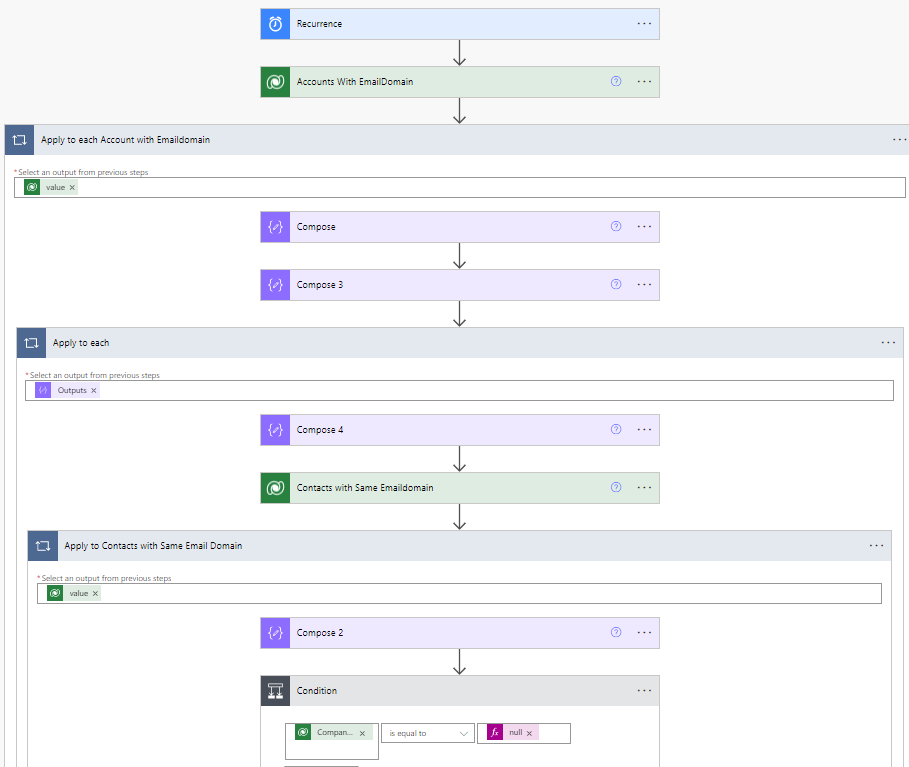
Complete Flow

Here is a screenshot of our entire flow:

Questions? Leave a message below.

We can also help you build this (and other) flows. Contact us via [email protected] if you need assistance with Power Automate or Dynamics 365 Sales.


Dynamics 365 Sales is a customer relationship management (CRM) software solution that is part of the Dynamics 365 suite of business applications. It is designed to help sales teams manage their relationships with customers and prospects and streamline sales processes. With Dynamics 365 Sales, salespeople can access customer data and interactions from a single platform, track sales activities and opportunities, automate tasks, and collaborate with other team members and departments.

Dynamics 365 can be used by Microsoft Power Automate to automate almost anything within Dynamics 365. Dynamics 365 and Power Automate together, make a great combination for further enhancement of your sales process.

In this example we will teach you how to use Power Automate to send a message to your sales staff via Microsoft Teams when a price change has been detected in a Dynamics 365 Pricelist.

Step 1: Create new Power Automate Flow

Go to https://make.powerautomate.com/ and click on “Create”, and select “Automated Flow”

Step 2: Enter Flow name and select Dataverse

Give the flow a name, and search for “dataverse” and select “When a row is added, modified or deleted”

Step 3: Configure Trigger that will start up our Flow

On the next screen we will configure the trigger. We will configure the Change Type to “modified” to ensure that the trigger only runs when a price list has been modified.

Table name: Price List Items (as we want to target Price List Changes in this case)

Scope: Organization (We want this flow to run for the entire dataverse organization, not just our user scope)

Step 4: Get details of product thas has been modified in the price list

First we need to get the record of the Product that had a price change. We will add a new action to our flow and search for “dataverse” and select “get a row by ID”

We will select the table name “Products” and for Row ID we will select “Product (Value)”

Step 5: Get Price List Currency

In our case we have price lists with different currencies, hence we will need to retrieve the actual currency of the pricelist.

We do that again with a Dataverse : Get Row by ID and select Currencies and Row ID: Currency (Value)

Step 6: Create Chat Message

Since the Teams “Post message in a chat or channel” is sometimes buggy when it comes to message layouts, it is recommended to draft your message in a compose, and parse the compose to the next step.

Here is our chat  message including a little layout tweaking such as adding <strong> </strong> to make some letters bold.

We want to show the product code, which in our case is a custom field named “Product ID”.  The amount is the local amount from the price list, for which we add the Curency as well in order to be complete.

Step 7: Post Message in a Chat or Channel

Now we can do the final step, which is to post our chat message in a group chat or in a channel. In our case we have a chat specifically for our sales team, where we want to post the message in.

The actual message is the output of our compose in step 6

When you’re done with above, the entire flow should have the following elements:

Now you can test your flow, and (hopefully) it should work. Here is an example of how it looks on our side:

Great Work! Feel free to reach out if you have any issues or questions regarding above flow.

Dynamics 365 Sales is a cloud-based CRM solution that enables salespeople to build strong relationships with their customers, take actions based on insights, and close deals faster. With Dynamics 365 you can manage your customer relationships, from first contact (lead) to qualifying (opportunity) to deal (Quote/Order).

Dynamics 365 can be used by Microsoft Power Automate to automate almost anything within Dynamics 365. Dynamics 365 and Power Automate together, make a great combination for further enhancement of your sales process.

In this example we will teach you how to use Power Automate to send a message to your sales staff via Microsoft Teams when a new lead has been assigned to them in Dynamics 365.

Step 1: Create new Power Automate Flow

Go to https://make.powerautomate.com/ and click on “Create”, and select “Automated Flow”

Step 2: Enter Flow name and select Dataverse

Give the flow a name, and search for “dataverse” and select “When a row is added, modified or deleted”

Step 3: Configure Trigger that will start up our Flow

On the next screen we will configure the trigger. We will configure the Change Type to “added or modified” to ensure that the trigger only runs when a new lead is added, or when a lead is modified.

Table name: Leads (as we want to target leads in this case)

Scope: Organization (We want this flow to run for the entire dataverse organization, not just our user scope)

Select Columns: We will enter “ownerid” here because we want to make sure that our trigger only runs when the field “ownerid” (which is the lead owner) is added or changed

Step 4: Get Current Lead

First we need to get the record of the lead that had an addition/change to the lead owner. We will add a new action to our flow and search for “dataverse” and select “get a row by ID”

We will select the table name “Leads” and for Row ID we will select “lead ID”

Step 5: Ignore Closed Leads

To make sure we’re not going to process leads that have been closed already, we need to filter out the closed leads with a condition. We can do that by terminating the flow if the “Lead Status” is equal to 0.


Step 6: Get Lead Owner

For the leads that are not closed, we continue by getting the lead owner from the relationship between table “leads” and “users”. We can do that by retrieving the Table “Users” and get the row id from the Owner Value from the Leads.

Step 7: Get Lead Owner Email Address

Since we want to send a teams message, we will need to retrieve the primary account UPN for that particular owner. We can do that by creating an action called “Get user profile (V2)”, and search the user based on the primary email address we got from the previous step.

Step 8: Get a Mention token for a user in Teams

Since we want to send a message in a particular channel, and tag the owner in the message, we need to get a “mention token” for this user. We can do this with the task “Get an @mention token for a user” from Teams, and use the user principal name we got from the previous step:

Step 9: Delay task for 1 Minute

In order to make sure that Teams is ready to accept our message with mention token, it is recommended to add a 1 minute delay, to make sure no errors occur:

Step 10: Post a Message in a Chat or Channel

Now we have all the information we need, we can post a message in a Teams Channel. In our case we post it in a group chat, but you can also choose a channel.

For the message, we will include not only the Lead Company Name and Lead Topic, but we also want to include a link to the actual lead in dynamics.

Make sure that you enter the fields using the Code View “</>” option, so your urls will not be truncated or broken. In the Code View option, you can enter HTML code to change the layout of the text. (We use <p> for paragraphs, <br> for lines etc

You can see from above screenshot, we first add the “mention token” and then we also include a link to the URL of the lead in Dynamics.

How to get the Lead URL in Dynamics:

  1. Go to Dynamics 365 – Leads
  2. Click on any Lead
  3. Extract the URL from your browser, and remove the last guid from the url (see orange below)

The URL you should use should looks something like:

https://xxxxxxxxxxxxx.dynamics.com/main.aspx?appid=xxxxxx&pagetype=entityrecord&etn=lead&id=

Now paste that in your Flow and make it a Link using the html <a href=””>  lead </a> code.

When you’re done, your flow should have the following steps:

Now you can test your flow, and (hopefully) it should work. Here is an example of how it looks on our side:

Great Work! Feel free to reach out if you have any issues or questions regarding above flow.